
Success-based pricing is one of the more recent pricing models that has gained adoption in software. It is a model where what you are charged for is directly linked to the results or specific outcomes achieved by your customer.
This aligns your revenue with the tangible value delivered to your customers.
From an implementation perspective, success-based pricing is simply a permutation of usage-based pricing, with a shift towards a value metric that is more aligned with customer outputs.
There are complications to think about, though, particularly in three things:
Defining what that value metric is and how you intend to be accountable against it
Modeling the aggregated metric so that it’s measurable by both you and your customer
Making sure your users trust the calculation
The beauty of more traditional pricing models such as subscription-based and usage-based, is that they are based on inputs which are quite objective. Work-based and success-based models, on the other hand, can get squishy if defined poorly and harder to model.
We won’t cover how to choose a success-based metric in this guide, but we may elsewhere if there’s enough interest.
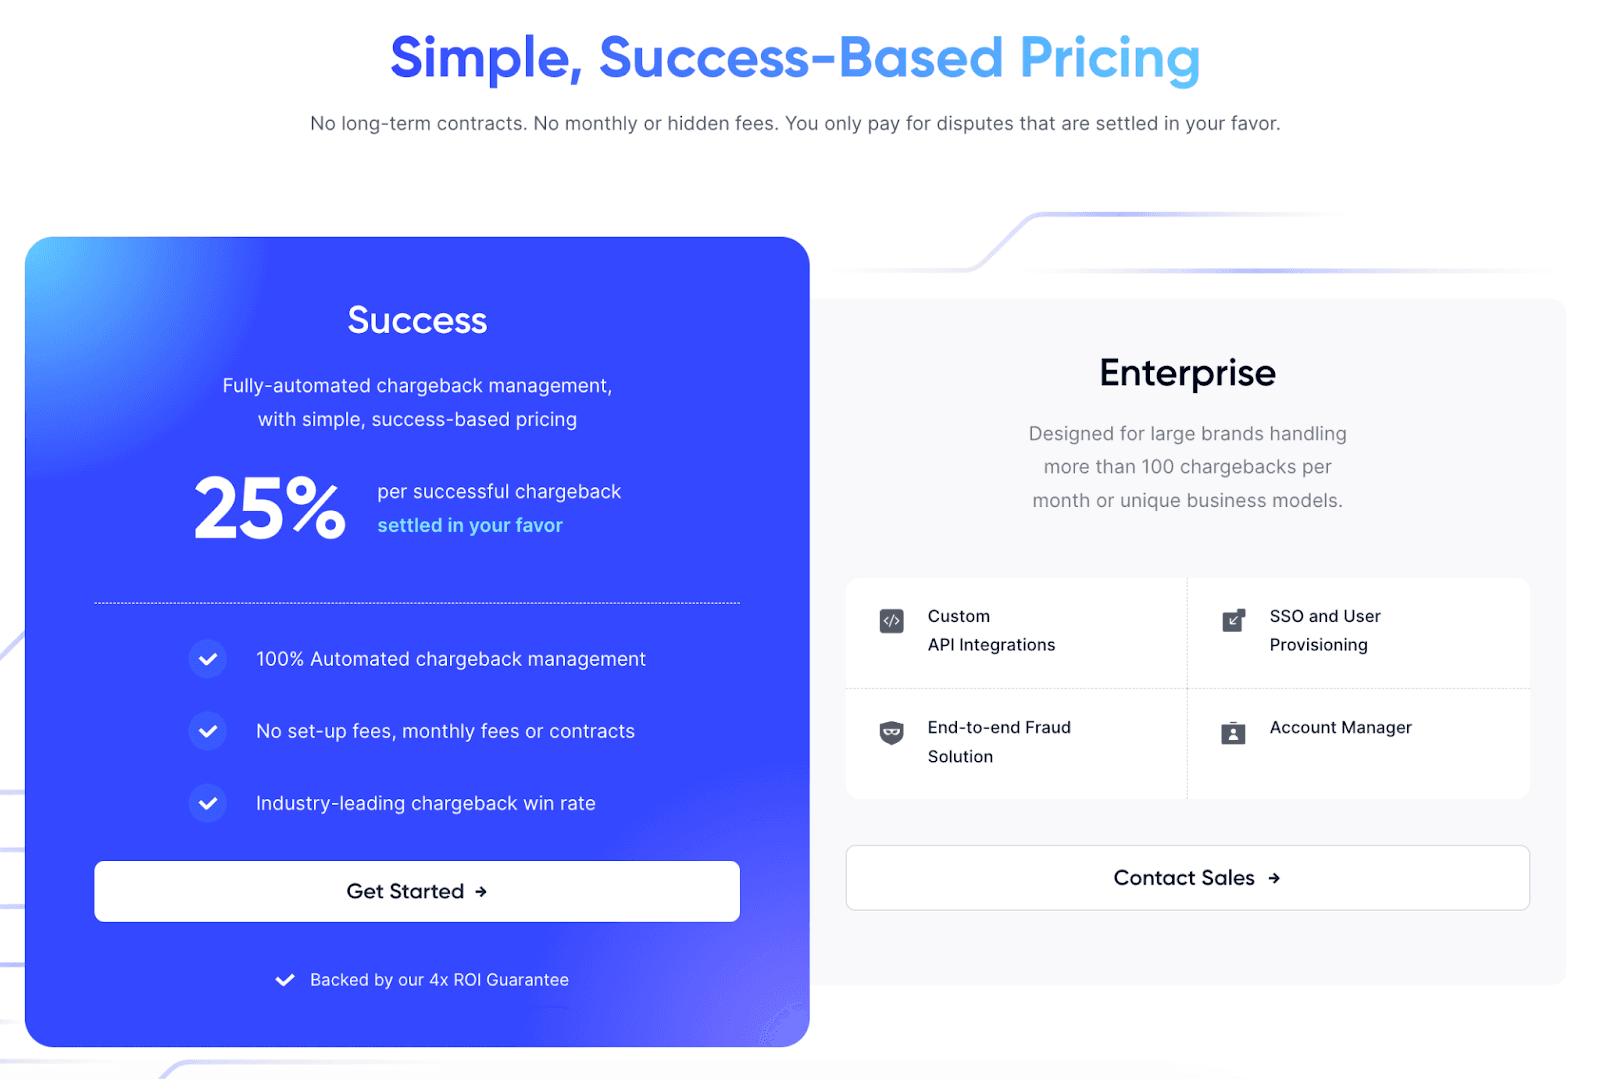
In the example below, let’s assume you’re Chargeflow, implementing a success-based metric that’s equivalent to 25% of “successful chargebacks”. Let’s also assume your customer is using Stripe as their payment provider (to charge their customers), and you are using Stripe as your billing solution (to charge them).
A little confusing, I know, but we’ll denote the two as Customer Stripe vs. Chargeflow Stripe.
The solution will involve a few things:
Measuring and storing dispute activity from Stripe in our application
Setting up Chargeflow Stripe with the appropriate configuration to measure and bill for successful chargebacks
Emitting meter events from our application when successful chargebacks happen
Giving end users visibility so they feel like what they're being charged is fair
Let’s get into it.
In this case, a successful chargeback (aka dispute) is when a dispute is recovered. Chargeflow claims to automate recovery, leading to better outcomes and reclaiming otherwise lost revenue.
We’ll have to make some assumptions here because we can’t find full fidelity on Chargeflow’s website – let’s assume we charge as close to when the recovery occurs as possible, on a daily, rolling basis.
To set up a success-based pricing model, Chargeflow needs to set up a means to track successful chargebacks. That requires a couple of things:
A means to denote which disputes we have a hand in within Customer Stripe
A system to aggregate dispute activity from Customer Stripe
Fortunately, Stripe makes tracking and measuring disputes quite easy via their API – we can see the Dispute object reference here, which includes all the necessary metadata including amount and status.
We’ll set up a service that listens for webhooks from Customer Stripe and then retrieves updated dispute activity from it.
The interaction between Stripe and Chargeflow might look like this:
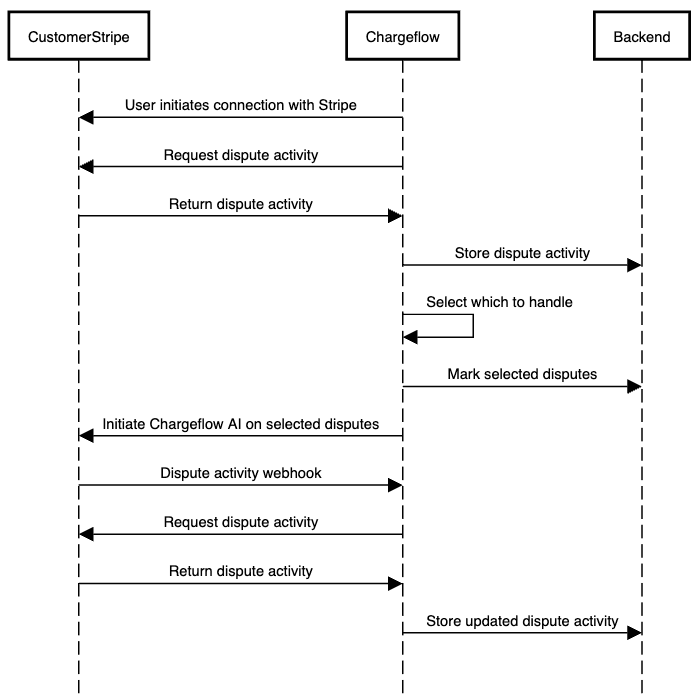
For strictly usage-based pricing that might be focused on input metrics, simply aggregating the number of successful disputes Chargeflow was involved in would be enough. However, in a success-based model, we must also aggregate the amount that was recovered and perform an operation which we’ll dig into later.
Within Chargeflow Stripe, we’ll need to set things up to properly bill for the amount of successful chargebacks.
Stripe has limited options to model billable data. It can parse event volume and event values, but there is no way to perform operations beyond simple operations on either – e.g. SUM, COUNT, LAST, or MAX (read more about Meters here).
Therefore, we’ll have to be a bit clever to implement Chargeflow’s model, which charges their customers 25% of successful chargebacks.
First, we’ll set up a new product called “Chargeflow AI” and configure it with a Recurring model. We’ll click into “More pricing options” to set up our usage based model.
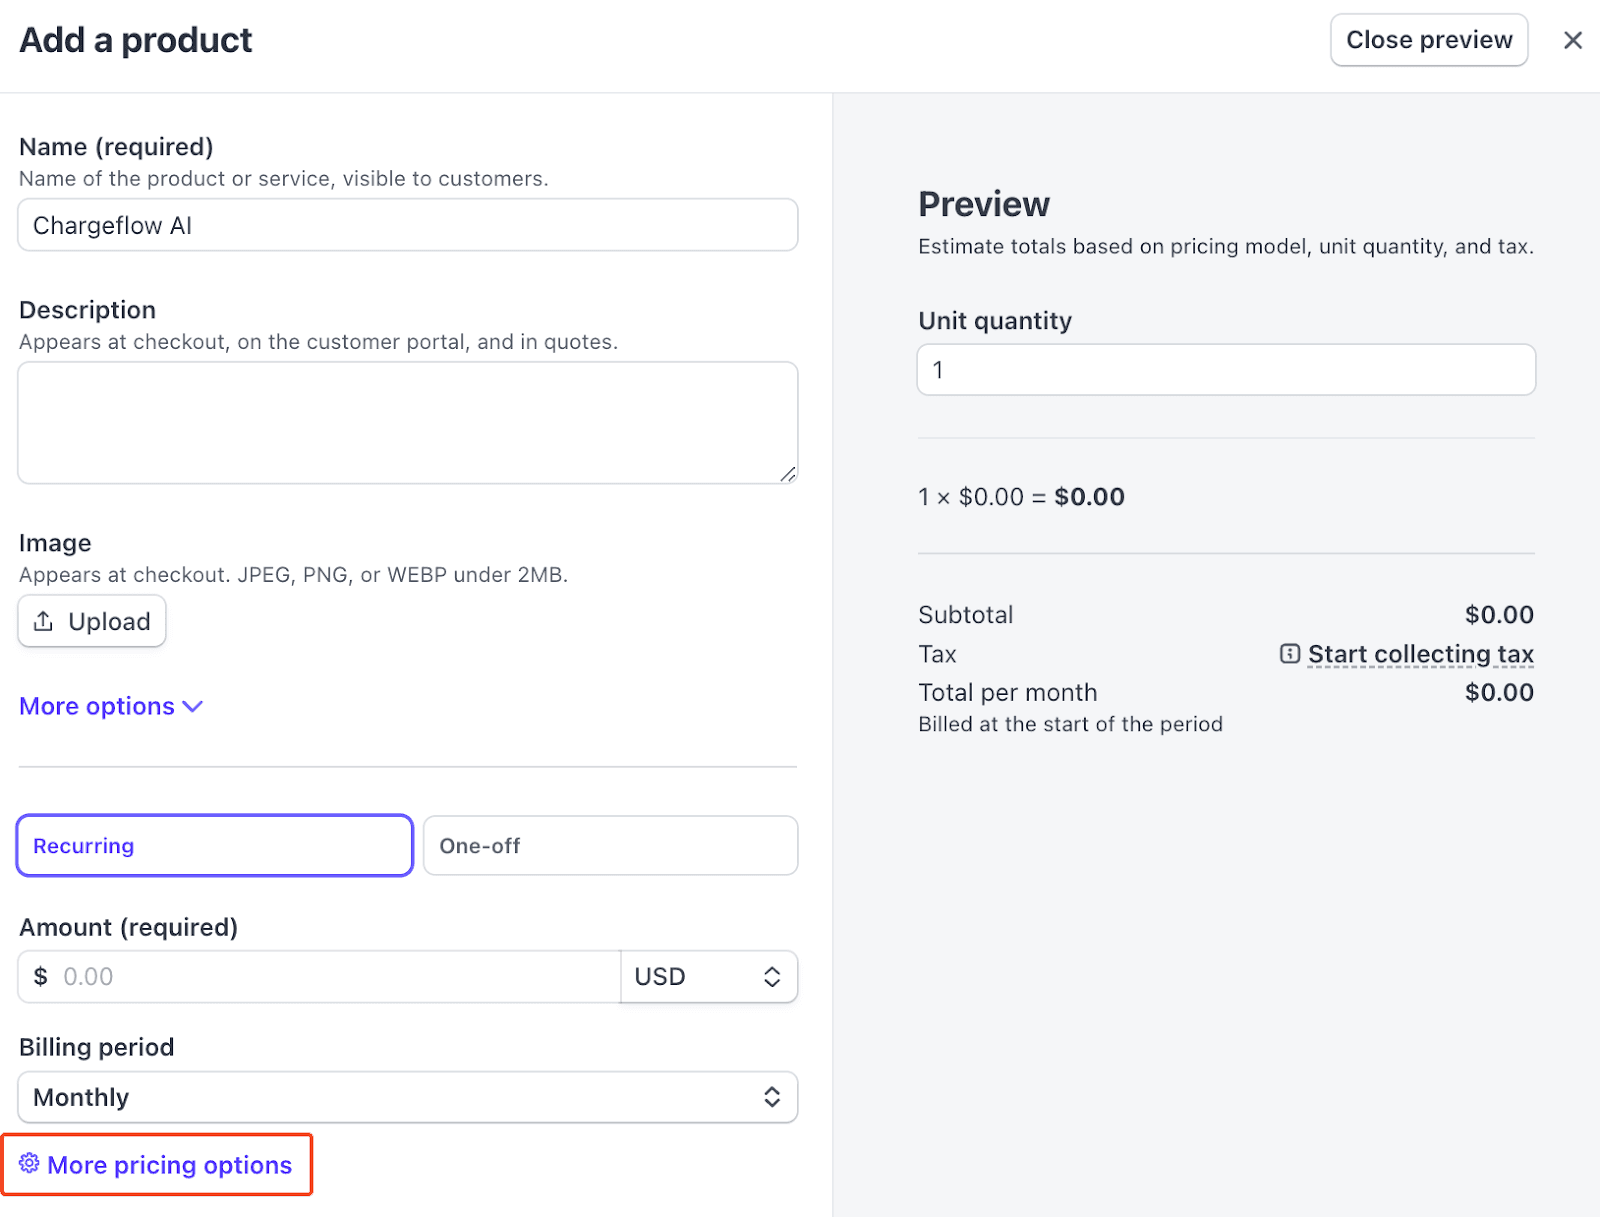
Then, we’ll set up our usage-based pricing model and meter:
Select “Usage-based” and “per unit” from the dropdown
Denote the price $0.25 per unit, which will act as our 25% of successful chargebacks
Click “Create meter”
Call it "Successful chargeback”
Select “Advanced options”
Override the value key as “chargeback_amount” – this is what we’ll populate with the amounts associated with successful chargebacks
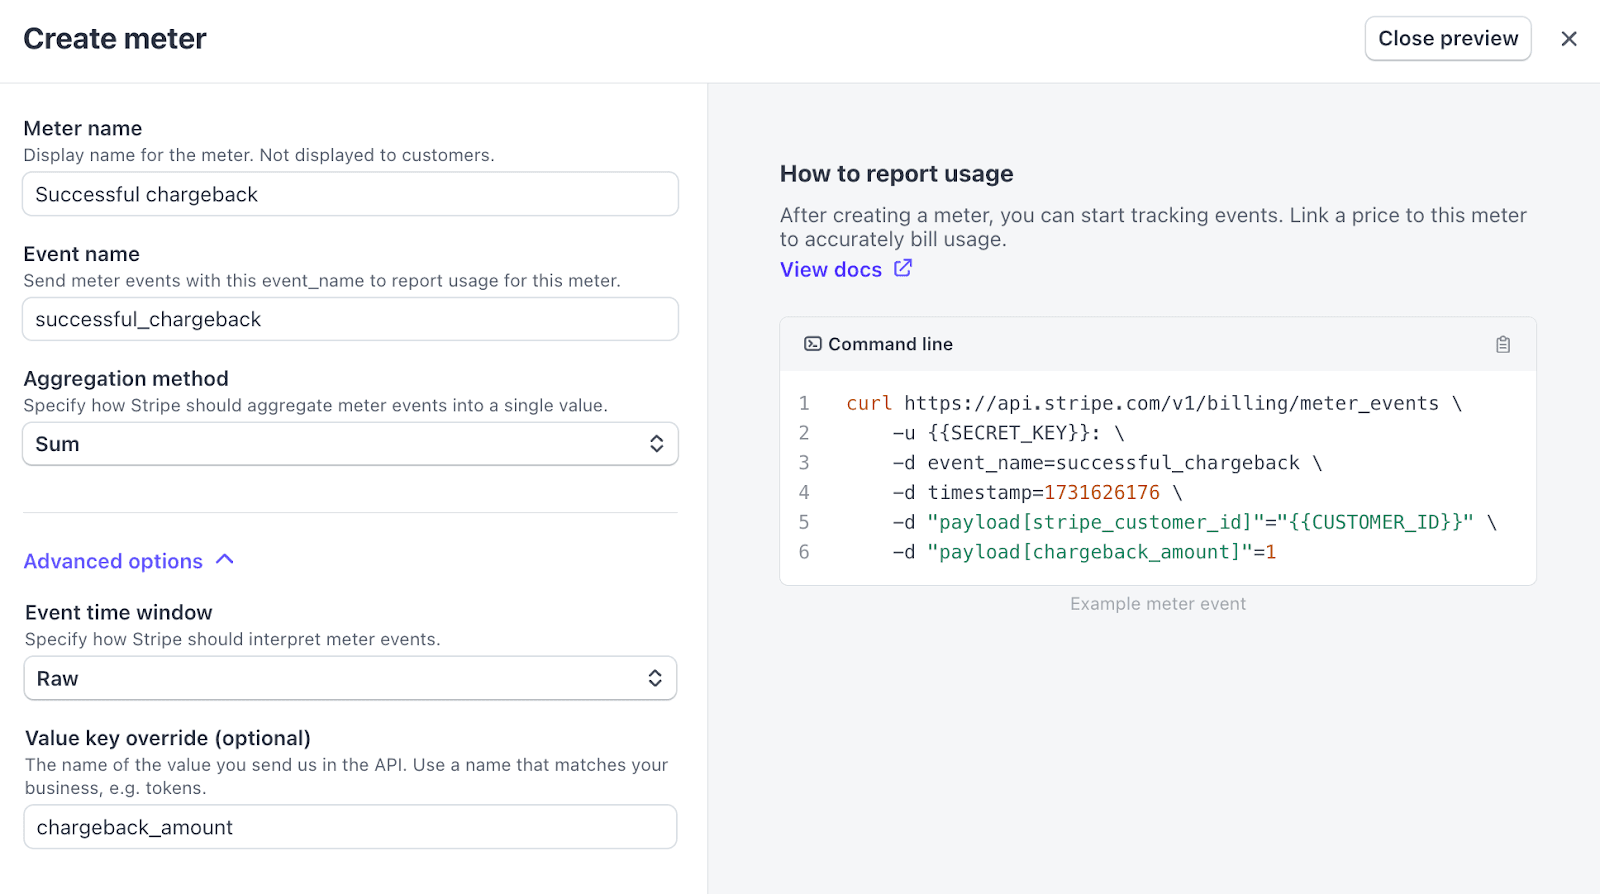
We can then save the Meter and the Product.
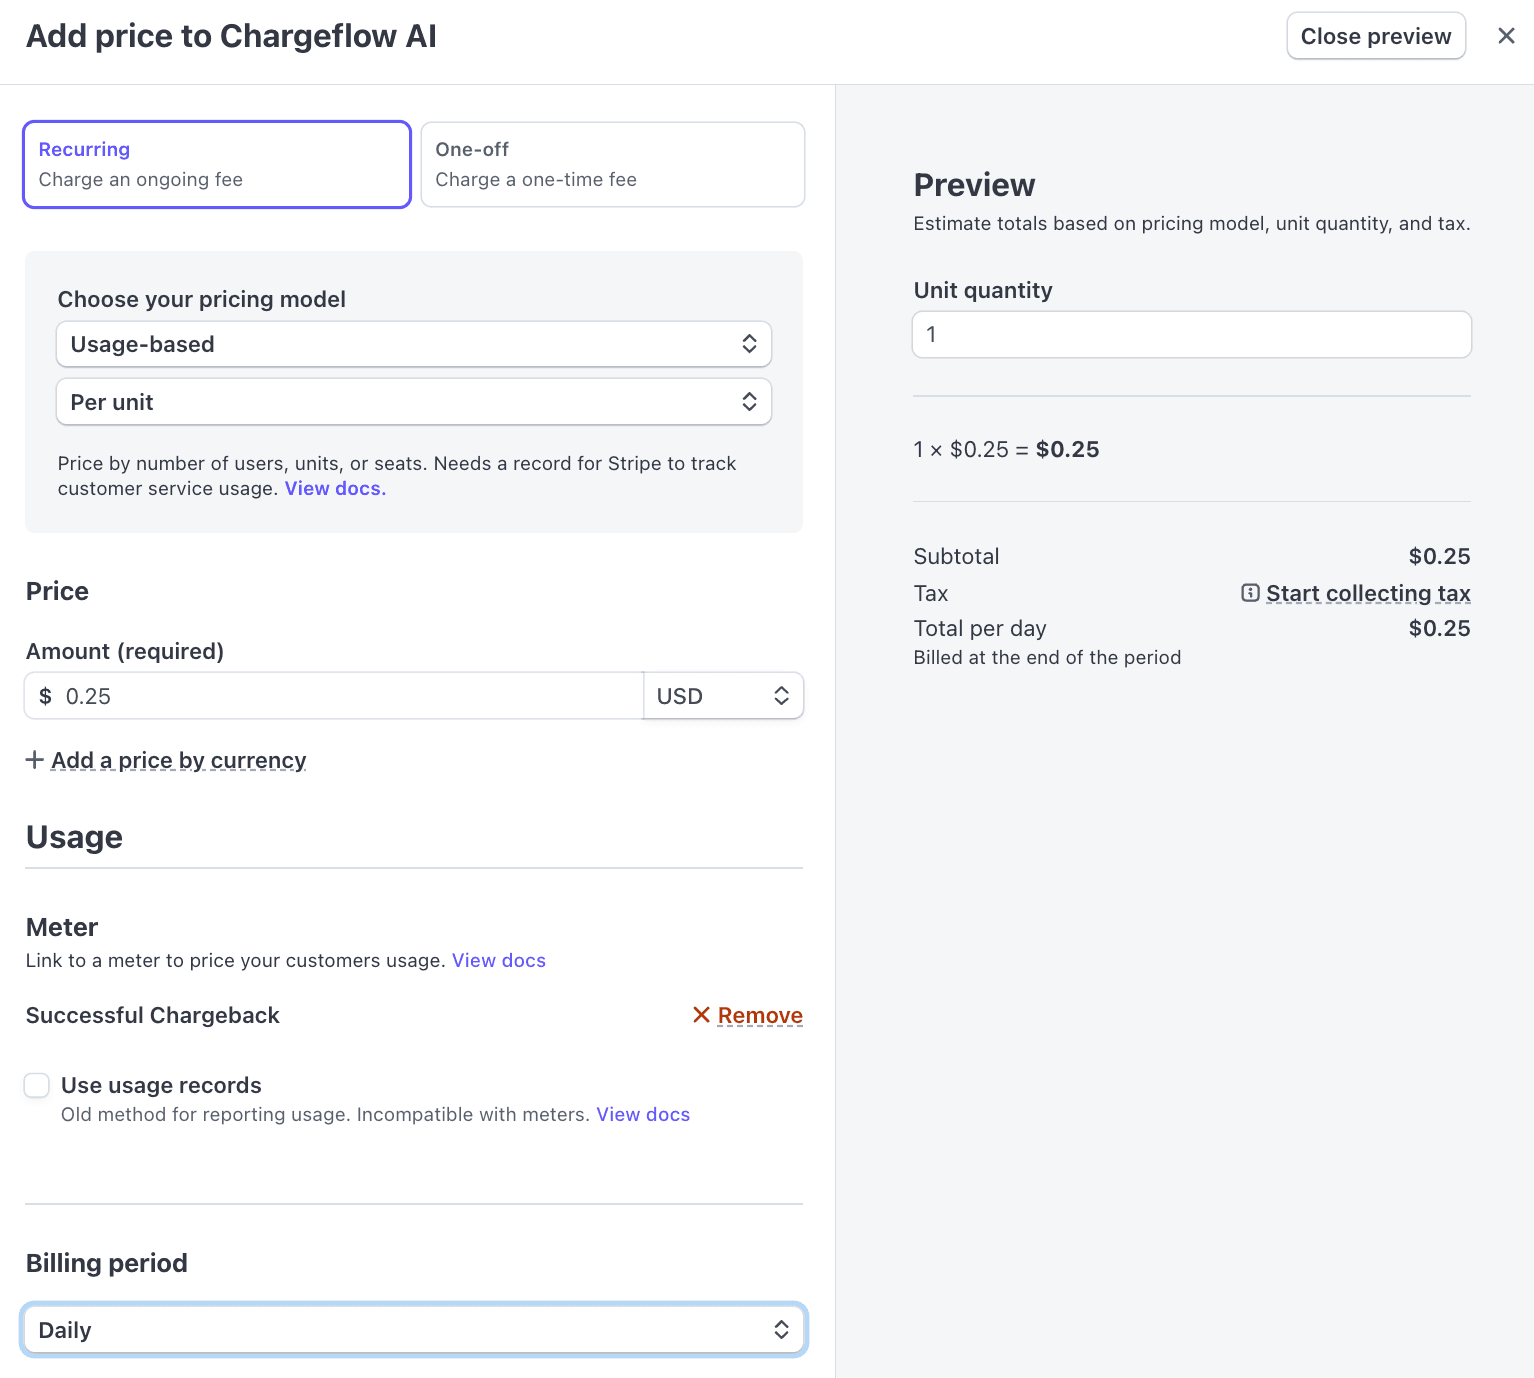
Any customers that have negotiated pricing lower than 25% of successful chargebacks can be accommodated by creating a new price within the Chargeflow AI product. The same meter should suffice.
Now that Chargeflow Stripe is set up, we’ll need to make sure the application is set up to do two things:
Emit events as successful chargebacks happen and associate with the right customer
Show the customer what they're paying for clearly
We'll use Schematic as a layer on top of Stripe to make that integration as straightforward as possible and to generate the UI elements automatically. We'll assume Schematic is already integrated with our Stripe account.
Emitting events
In Schematic, set up a pay-as-you-go plan that is linked to the Chargeflow AI Stripe product we just configured.
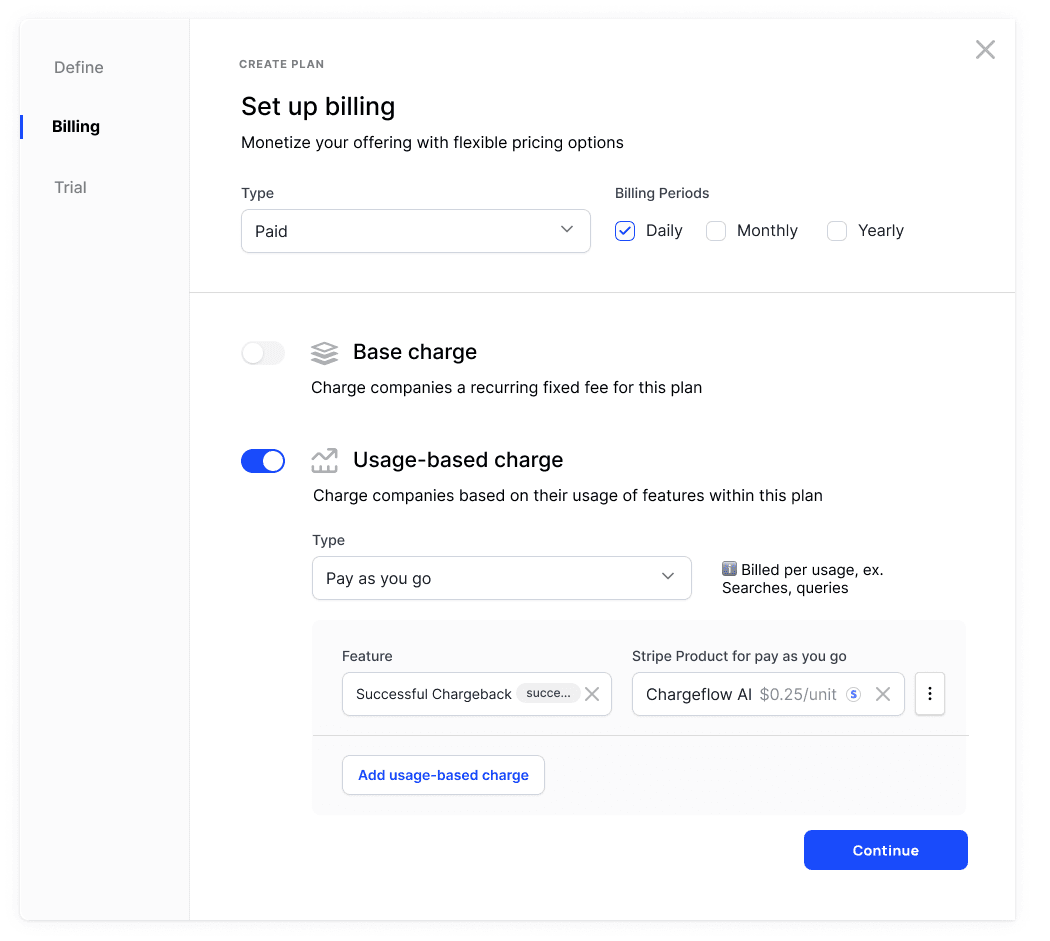
When a successful chargeback occurs, we’ll send an event to Schematic with the chargeback amount and the GUID of the company. For example, let’s submit an event for $1,250 in recovered revenue.
import { SchematicClient } from "@schematichq/schematic-typescript-node";

const apiKey = process.env.SCHEMATIC_API_KEY;
const client = new SchematicClient({ apiKey });

client.track({
	event: "successful_chargeback",
	company: {
		id: "0e3bd44e-6847-49ea-b0f1-79d75c44d2c5",
	},
	traits: {
		chargeback_amount: "1250",
	},
});

client.close();
Schematic will receive each event, associate to the right customer, and pass billing meter events to Stripe against the mapped product for payment, which will invoice over the daily period we configured. If the above was the only successful chargeback that day, the end customer would receive an invoice for $0.25 * $1,250 = $312.50.

Because we’re storing all disputes within the application, including status and amount, we will be able to use that data as an audit trail in the event of any of our own disputes.
Surfacing billing information to the customer
We'll then generate a Schematic Component to embed into the application to give our users visibility into exactly what they're being charged for.
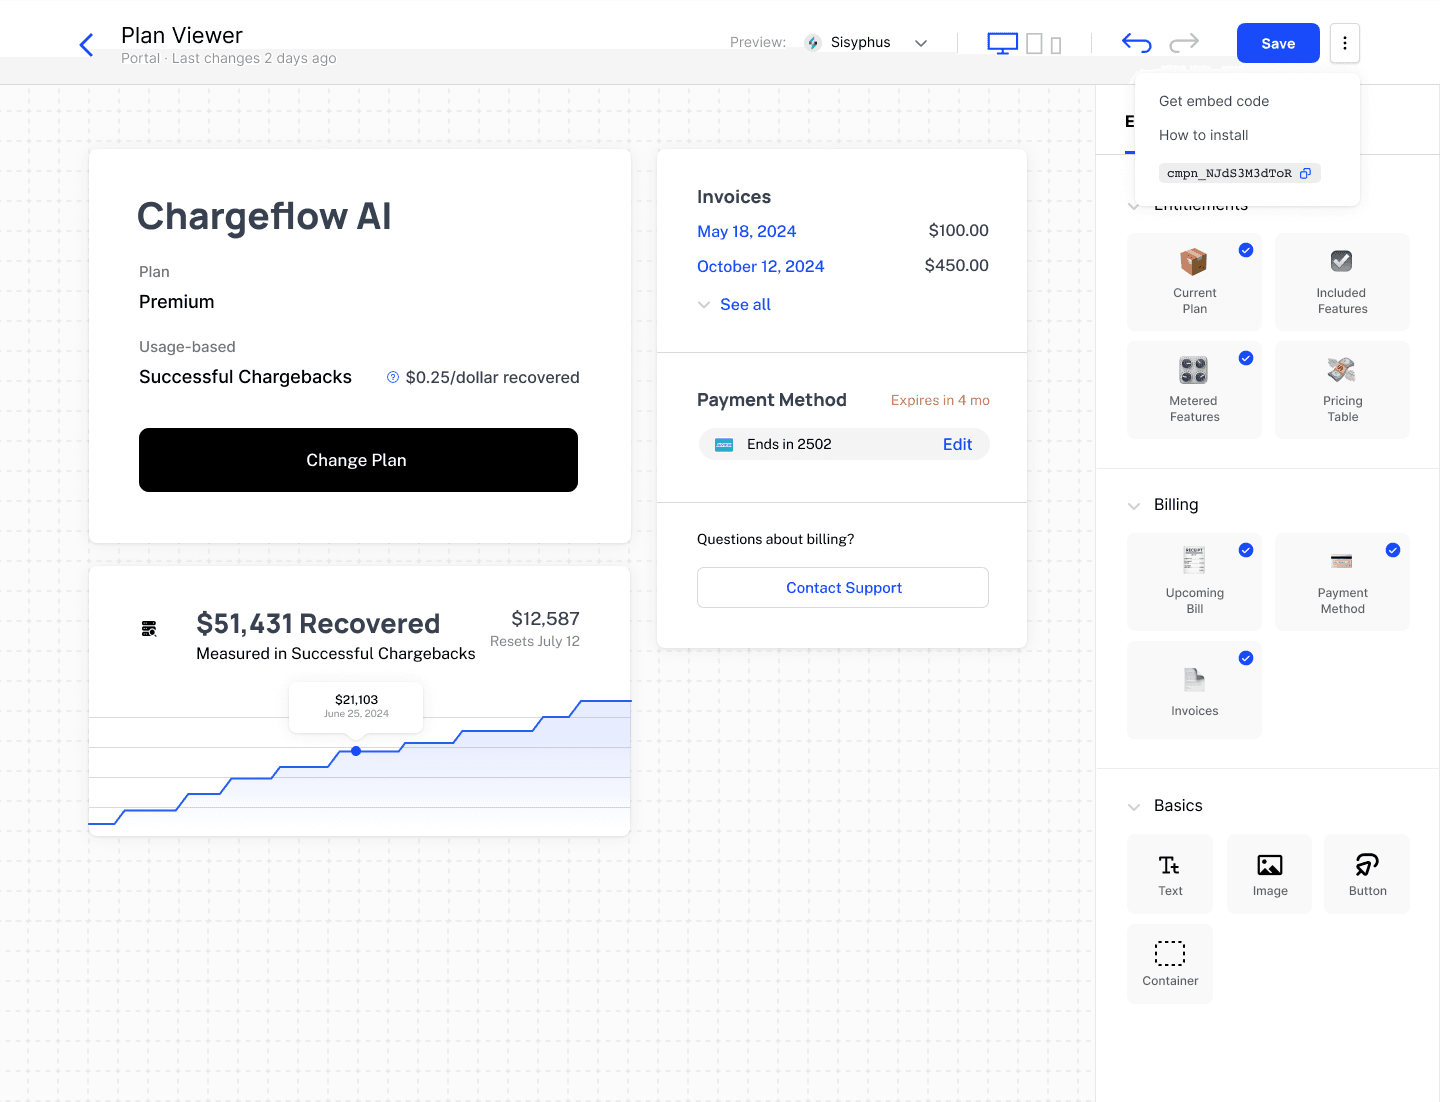
We'll set up our server for a token exchange for the logged in customer, and then drop the component into our plan management page within our app with a version of the following code:
import { SchematicEmbed } from "@schematichq/schematic-components";

export default function CustomerPortal({ accessToken }: { accessToken: string }) {
  const componentId = process.env.NEXT_PUBLIC_SCHEMATIC_COMPONENT_ID;
  if (!componentId) {
    return <NotFound />;
  }

  return (
    <SchematicEmbed accessToken={accessToken} id={componentId} />
  );
}In actuality, Chargeflow’s implementation of their pricing model might have some additional layers of sophistication, but the above should be representative of the basics.
Some things we did not cover that might be additional considerations beyond the core billing logic include:
Accommodating unique billing and entitlement requirements for enterprise deals (e.g. custom overrides)
Implementing hard limits to avoid abuse or allow our end users to control Chargeflow usage themselves
Providing internal team members control and visibility across customers
Pushing data into sales, accounting, and revenue systems for operational needs
All of the above is possible within Schematic with minimal code changes in your application.